4. Fastening and Sealing the Unit
Jamb Installation:
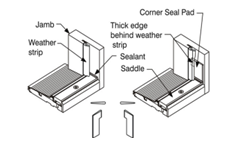
- Apply a generous bead of sealant behind the perimeter of the jamb where it will meet the opening.
- Secure the jamb using #10 x 3/4” screws.
Shimming:
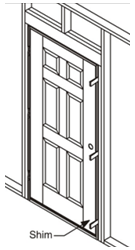
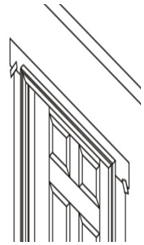
- Shim behind the hinge jambs, lock jambs, and head jambs to maintain a plumb and square frame.
- Place shims every 12”, 6” from the top and bottom of each jamb.
Head Jamb Sealing:
- Apply corner seal pads where the threshold meets the jamb corners for additional water protection.
Caulking the Exterior:
- Seal the perimeter of the unit where the jamb meets the sheathing.
- Apply sealant along all edges of brickmould (if present).


5. Final Adjustments and Weatherproofing
Threshold Adjustment (Inswing Doors):
- Ensure the threshold creates a tight seal with the door bottom by adjusting the set screws.
Exterior Sealing:
- Apply additional sealant at the bottom corners of the sill where it meets the jamb.
- Seal joints between exterior hardware trim and the door face to prevent water infiltration.
Insulation:
- Add insulation between the rough opening and the door frame, ensuring no compression that could bow the frame.
Cap Flashing:
-
- Install properly aligned cap flashing above the unit to divert water away from the head jamb.

6. Quality Assurance
- Inspect all caulk joints and sealants for continuity.
- Verify that the unit is square, plumb, and securely fastened.
- Confirm all exterior and sill areas are sealed to Wilson Lumber’s standards.
- Perform a final inspection to ensure all water mitigation measures are in place.
Maintenance and Recommendations
- Periodically check sealants and finishes for deterioration and reapply as needed.
- Ensure all water management systems (flashing, sill pans, sealants) remain intact.
- Swing-out doors require regular inspection of top, bottom, and side edges for finish integrity.


